


Editor’s note: We’re right in the middle of pie week. We’re rolling out expert opinions on crust, where to find your ideal latticed (or not) pastry nearby, a hard-to-believe-it’s-gluten-free rendition and, yes, plenty of inventive seasonal recipes. To get you inspired for your own pie making, we reached out to Hannah Kirshner of Sweets & Bitters to show us how to master pastry surface design in the comfort of our own kitchens. Check it:
Achieving a beautiful lattice for your pie can be intimidating, but it doesn’t have to be. Some of my favorites are abstract, freeform and only include laying strips of dough across the pie. It’s easy as you-know-what, and can look undeniably unique. This Thanksgiving, whether you’re hoping to master a classic basket weave, or come up with your own surface design, we’ve got you covered.
First things first: you must choose a pie crust recipe. There are many delicious ways to go about this and we suggest that you experiment ahead of time to decide which crust is worth your commitment. A solid place to start is with this dough recipe (fillings are always variable) for both bottom and top crusts from Food52’s Erin McDowell.
Once you’ve decided on, made and rolled out your top crust, put it on a cookie sheet and stick it in the freezer for a few minutes so that it’s firm but still malleable (to give yourself more time, freeze the bottom crust and filling for at least 15 minutes, so it won’t get all soggy and soft while you design the top). Before you start slicing it into strips though, consider a couple of other options: You can use a cookie cutter to punch holes, or cut out shapes and cover the pie as you please. Either option will give you the peak-a-boo look of lattice.
If you’re not going the cookie-cutter route, slice the dough into strips. How wide? It’s up to you — I cut them about 5/8 of an inch thick for these photos, but I love a fat lattice of 2-inch wide strips too.
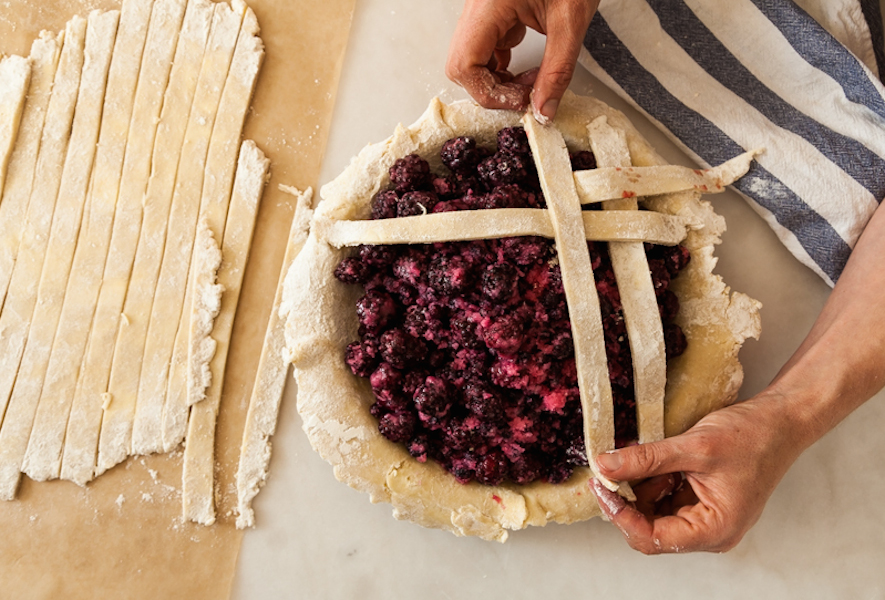
To make a classic lattice, lay a short strip close to the edge of the pie (save the long ones for the middle). Place another perpendicular to it, so you’ve made a right angle in one corner of the pie. This is your pattern; now repeat it, alternating perpendicular strips.
You have two choices on how to proceed after the first few strips. You can do the (very tasteful) cheater’s version, and just keep laying down perpendicular lines. They’re not really woven, but they’ll look like it. Or you can do it the fancy way by folding back some of the strips each time so that the new strip gets woven in. This is hard to explain in words, but a picture is worth a thousand check out the images above.
As for variations, don’t be afraid to play! Draw with the strips. Make zigzags or waves. Spiral them around into a star shape. For my new favorite look, lay them down at random to make a pleasing abstract. It’s modern, cool and impossible to mess up. See the images below for some inspiration. Lattice, rejoice!


Photo credit: Allison Davis
